Contents
- 0.1 Pre-Step 1: Gain Access to the sewers.
- 0.2 Pre-Step 2: Unlock the Bunker Door
- 0.3 Charge the device
- 0.4 Escort the Transfer Device & Complete Tesla Gun
- 0.5
- 0.6 The Right Hand of God
- 0.7 Lightning Rod Defense
- 0.8 Put Lead into Zeppelins (I’m so Pun-y).
- 0.9 Start The Voice of God
- 0.10 Kill the Panzermorder
- 1 Author
Some of us buy Call of Duty to get an exhilarating campaign experience (sometimes..), or to practice our craft in online multiplayer so that maybe one day we can play among the best, as a true MLG star. Then there are those of us who revel when a mystery box graces us with a thunder gun or wunderwaffe, giving you the power of a zombie killing machine. CoD WWII is no different this time around, with players already putting hours into trying to complete the Easter Eggs within Nazi Zombies. Completing objectives to obtain the Tesla gun, defeat the epic boss battle, and of course survive the onslaught on zombies throughout the entire process will grant you the coveted “Fireworks” Achievement.
Here is our step by step walk-through to obtain the “Fireworks” achievement in CoD WWII Nazi Zombies.
There are a few things you need to tackle before you head straight into the first steps of completing the Easter Egg.
Pre-Step 1: Gain Access to the sewers.

Follow the power cords to the valves
- Turn on all 3 valves located in the Village square. If you look on the ground, you will see red cords branching out to different portions of the map in the starting area. Follow them until you reach the valve and turn them on.
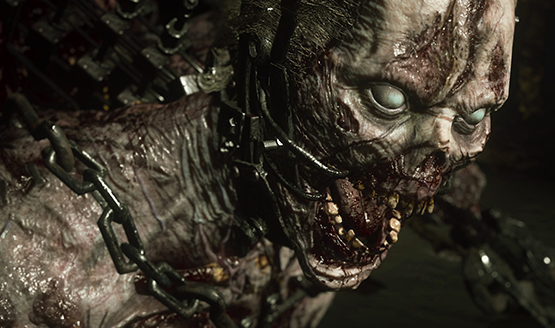
- From here you will head back to the center of the village square and turn on the Pilot Light, which will spawn some interesting zombies. Kill them and drop into the sewers.
- Follow the Sewers until you arrive at the generator (you can’t miss it), and turn on the power to the Bunker Door.
Pre-Step 2: Unlock the Bunker Door
- Once you gain access to the Bunker door and command room, walk in and activate the switch to the triangular-metal hatch (you will need this later), which will be directly to your right as you walk into the main command room.
- Activate the Switches in the Morgue/Lab

Power switches to pen the Salt Mines
- Activate the Disposal tube system in the sewers and unlock the weapon upgrade station.
Now that we have everything we need to start the Easter Egg, we can go through the Salt mines and start the zombie killing extravaganza.
Charge the device

The Emperors Chamber
Head through the Salt mines door and down to “The Emperors Chamber”. You will see a strange looking machine with 3 modules surrounding one center device with a hilt directly in front of the massive statue. Interact with the hilt and begin to slay some zombies near the modules to power up the device. Once the device is powered, the room will turn bright orange and the lights will shut off (this actually gets sort of terrifying). Leave the emperors chamber and head back up to the Tesla Gun assembly station in the command room.
Escort the Transfer Device & Complete Tesla Gun

Open this to get the transfer device to the command room
Once you get back to the command room where the Tesla Gun assembly station is, hit the red button directly behind the table. This will lift the transfer device from the metal hatch (remember the one we opened in pre-step 2) and start to move it along the rail. Use your touchpad to see the device highlighted and kill zombies under it to charge the device, but keep in mind stronger zombies give the device more charge. Follow the transfer device until you reach the generator. Once fully charged wait about 30 seconds until it produces a piece of the Tesla Gun. Head back up to the command room and place the piece on the assembly. Repeat this process on the opposite side. Once you collect the second piece of the Tesla Gun from the opposite generator, head back to the command room and place your piece on the assembly.
A Brenner Zombie will spawn when you return to the command room to assemble the weapon, so you will need to deal with him promptly. Shoot his 3 gas tanks on his back first, as you will need to destroy these before you shoot his body to kill him. When the Brenner Zombie dies, he will leave behind a Brenner Head, which will be needed later to help summon the epic boss fight. Pick up the head and place it somewhere you will remember. You’ll thank me later.
Once you finish off the Brenner Zombie, head back up to the top of the command room and retrieve your Tesla Gun, you are going to need it for later in the Easter Egg.
The Right Hand of God

Breaker panel and first power panel
Continue back down to the salt mines where the altar is. Walk up to the device on the left hand side of the room when you enter and examine it. Head back to the command room and look for the breaker panel adjacent from the Tesla Gun assembly station. Activate the power and write down or, if you have good memory, remember the colors shown below each number. We now have all the information we need to complete the puzzle and Reroute the Power.
The next step is finding the power breakers numbered 1-4 and match the corresponding color to each. There is a time limit before it resets, so be sure to move quickly or have your friends waiting at the stations before you activate the power. Here is where you can find the power stations.
- Power Station 01: Directly to the right of the color panel you start to activate the puzzle.
- Power Station 02: In the Sewers, near the Morgue path.
- Power Station 03: In the Sewers, at the end of the path leading to the river.
- Power Station 04: Near the tower gate, close to the pub.
Now that we have finished rerouting the power, we will need to defend the lightning rod.
Lightning Rod Defense
Find the base of the tower just past the panel near the pub after you buy a couple gates. Here you will find the two lightning rods you will need to interact with. Activate the first rod in the middle, and be ready to fend off a wave off zombies hell bent on destroying the rod. This will last for a few minutes in a very cramped area with little room for mobility, so say a prayer and keep your finger on the trigger. Repeat this step for the second rod to the left of the first to finish the sequence.
Head back to the Salt mines and examine the Left Hand of God.
Put Lead into Zeppelins (I’m so Pun-y).
All jokes aside, let’s head back outside to look at the sky, where a giant zeppelin will be floating around the center of the map. Look for the orange and red lights under the belly of the zeppelin and start putting some some lead into it (sorry I had to). The Zeppelin will fire back with some crazy lightning strikes so be cautious and aware of your surroundings. Once you do enough damage a generator will drop from the Zeppelin somewhere on the map, which of course you must locate.
Once you find the generator, lead zombies within the red circle around it and start to kill them to charge it up. When the generator is fully charged it will spawn a battery for you. Take the battery back down to The Emperor’s Chamber and place it in The Left Hand of God.
Repeat this process twice more for the remaining “hands” in the altar room. Beware, the zeppelin will fake you out on the third generator drop by picking it back up. Continue to shoot the zeppelin until he drops the last generator. Charge it up and take it to the altar room.
Start The Voice of God
Now let’s go get that shiny little Brenner Head we left behind awhile back, and hopefully you remember where you put it. Pick up the head and aim with it to activate a glow that will show the secret messages on the paintings around the map. There are four we must find that contain a hidden message to complete the next step. You can find the paintings here.
- Painting 1 is in the courtyard, next to the river by the steps
- Painting 2 is in the really dark area of the mortuary near the steps.
- Painting 3 is in the Sewers near the cage.
- Painting 4 is in the Pub close to the tower.
When you find the paintings, shine the light from the head to reveal a symbol that resembles a bird and a roman numeral. Each bird will be pointed in a different direction, so take note of which way they are pointing. The roman numerals will vary from I-V, and you can get duplicate numerals so pay attention. Once you have all of the information memorized, head back to The Emperors Chamber and walk up to the center hand. Enter in the correct combination of numbers into the device to move on to the next step.
Kill the Panzermorder
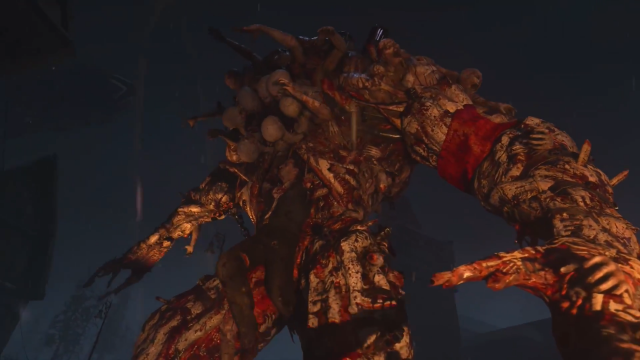
To spawn the final boss, you will need to shoot the hilt on the altar. If you are not playing solo, you will all have to coordinate and shoot the hilt with the Tesla Gun at the same time. Once you shoot it, go pick up the hilt and the Panzermorder will arrive.
To kill the final boss we need to repeat the same steps we completed for the zeppelin stage. Once again, head outside and shoot the lights on the zeppelin to get it to drop a generator. Charge up the generator to get it to explode and spawn your battery.
Here is the big difference. When the battery spawns, shoot the Panzermorder to stun it, and place the battery with it. Repeat this process three times, like you did the first time with the zeppelin step, and you will defeat the final boss. Once you beat the boss, it will take you to the final cut-scene on the quest line. You just beat Nazi Zombies! Well, the casual part at least. There is another quest line for expert zombie slayers to complete with absolutely no guidelines, so if you have a good eye give it a go.
